Mmmm yummy snack! And great this time of year with Christmas colored M&Ms. Looks festive and pretty.
White Chocolate Chex Mix
3 c. Rice Chex cereal
3 c. Corn Chex cereal
2 c. pretzels
2 c. mixed nuts
12 oz. M&Ms (I prefer dark chocolate M&Ms)
16 oz. white chocolate chips.
Combine all dry ingredients in a LARGE mixing bowl.
Melt chips in the microwave on high for 90 seconds. Stir chips as chips retain their shape when melted. If chips are not yet melted, pop back in the microwave for an addition 15-30 seconds and stir until melted. Pour over dry ingredients. Combine and stir until everything is well coated.
Place a sheet of wax paper on a cookie sheet. Pour mixture out on the cookie sheet and spread out mixture. Place cookie sheet in the freezer for 15-20 minutes. Remove from freezer. Break up the mixture and place in an airtight container.
Thursday, December 17, 2009
Chili
I HATE SPICY FOOD! I HATE SPICY FOOD! Did I mention that I hate spicy food? This chili is really really mild...so not spicy that you could give it to a child.
Mild Chili
1 lb ground round
1 c. elbow macaroni
2 15 oz cans tomato sauce
1 c. mild Pace picante sauce
1 can mild chili beans
3-4 t. chili powder
1-2 t. ground cumin
1/8 t. cayenne pepper
big pinch of garlic powder
big pinch of onion powder
Brown ground round. Season with salt, pepper, onion powder, and garlic powder. Cook until no longer pink.
Boil elbow macaroni pasta.
Combine beef and pasta in a large pot. Stir in beans (if desired). Add tomato sauce and picante sauce. Stir until well combined. Add in chili powder, ground cumin, cayenne pepper, garlic powder, and onion powder. Simmer on the stove on low until heated through. Or combine all ingredients in a crock pot and cook on low for 1-2 hours or high for 45 minutes to an hour until heated through. Serve with shredded cheese and saltine crackers.
NOTE: Add the chili powder and cumin in the chili 1/2-1 t. at a time. You don't want to go dumping a bunch of it in at once and find out it's too spicy for your taste. You can always add more in but you can't take more out!
Tuesday, December 1, 2009
Thanksgiving
We had a great Thanksgiving! It went by too fast! I have some cute pics from the holiday.
Gizzy liked the foot toy with peanut butter!

Maverick clowning around.


And enjoying some turkey.

Cheeko defending his new "fort."

And I made this yummylicious cheesecake. Recipe from foodnetwork.com. It's from Paula Deen so it's guaranteed butter-free, fat-free, and calorie free. LOL. Just kidding.

Pumpkin Cheesecake
Crust:
1 3/4 c. crushed graham cracker crumbs
3 T. light brown sugar
1/2 t. cinnamon
1 stick melted butter
Filling:
3 8oz packages cream cheese, softened
15 oz. can pumpkin (make sure not to get pumpkin pie filling by accident!)
3 eggs + 1 yolk
1/4 c. sour cream
1 1/2 c. granulated sugar
1/2 t. cinnamon
1/8 t. nutmeg
1/8 t. cloves
2 T. all-purpose flour
1 t. vanilla extract
Preheat oven to 350.
Combine crumbs, sugar, and cinnamon. Add melted butter and toss crumbs with a fork until everything is moistened. Press down into a 9 in. springform pan. TIP: To help press your crust down, use a the bottom of the glass and spray with a little bit of cooking spray (fids OUT and AWAY from the kitchen!) to keep crumbs from sticking.
In a separate bowl, beat cream cheese until smooth. Add pumpkin, eggs + yolk, sour cream, sugar, and spices. Add in flour and vanilla. Beat together until well combined.
Pour into crust. Bake for 60-70 minutes. (I baked mine closer to 70 minutes, but her recipe called for just an hour). Let cool, cover with plastic wrap, and refrigerate.
TIP: I bake my cheesecakes in a hot water bath. I place a layer of aluminum foil around the cheesecake pan and place it in a 15 x 11 pan that is filled with HOT water that comes halfway up the sides of the cheesecake pan. This helps reduce cracking by allowing the heat to indirectly bake the cheesecake. It works everytime. Just be careful no kids or dogs bump into you when taking it in or out of the oven.
Also, you know when your cheesecake is done when you touch it with WASHED, CLEAN HANDS and the center springs back. ;) No swine flu in the food please!
Thursday, November 19, 2009
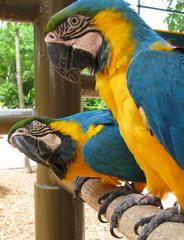
Macaw
I have been wanting a macaw for a very, very VERY long time. Since I was 5 years old actually. Now each day is a day closer until I can have one in my flock.

I got in touch with a breeder and my name is on a waiting list for a baby Blue & Gold. I decided in the end on the B&G instead of the scarlet. I have always loved the scarlet macaws but I feel that I would enjoy a B&G a lot more and feel it's better suited for me.

There are no babies yet. The parents have been busy in the nestbox. However I am on a waiting list. So if there's people infront of me, this could definitely be a while. And I'm more than happy to wait. I was impressed with the breeder's website and also reviews from other parronts with the quality of care and the amount of love they put into what they do. They really put the birds' best interest first and foremost and that's what's important.
A macaw lays a clutch of 1-3 eggs. Incubation period can be 26-29 days. And it can take months to wean a baby. Handfeeding is very tricky. If you get the food down the wrong tube, you can kill the bird. It's a very, VERY delicate thing that's best left to professionals. A huge problem in aviculture is a lot of dishonest breeders out to make a buck will sell unweaned babies. You see it and read about it all the time on the forums. These poor people have a baby that's not weaned and they are freaking out, not knowing what to do. I know someone who got into a weaning nightmare with a shady breeder and it was a very, very heartbreaking situation.
I feel that this is something I have extensively been researching for a very long time and definitely feel ready to make the commitment. It hasn't been thought through lightly, as this bird could potentially outlive me. This will most likely be my last feathered kid.
I'll keep posting updates and keep everyone informed.
OH and I'm sure you all want to know...regardless of the sex, boy or girl, the bird's name will be Rudder...yes...as in an airplane rudder...
I got in touch with a breeder and my name is on a waiting list for a baby Blue & Gold. I decided in the end on the B&G instead of the scarlet. I have always loved the scarlet macaws but I feel that I would enjoy a B&G a lot more and feel it's better suited for me.
There are no babies yet. The parents have been busy in the nestbox. However I am on a waiting list. So if there's people infront of me, this could definitely be a while. And I'm more than happy to wait. I was impressed with the breeder's website and also reviews from other parronts with the quality of care and the amount of love they put into what they do. They really put the birds' best interest first and foremost and that's what's important.
A macaw lays a clutch of 1-3 eggs. Incubation period can be 26-29 days. And it can take months to wean a baby. Handfeeding is very tricky. If you get the food down the wrong tube, you can kill the bird. It's a very, VERY delicate thing that's best left to professionals. A huge problem in aviculture is a lot of dishonest breeders out to make a buck will sell unweaned babies. You see it and read about it all the time on the forums. These poor people have a baby that's not weaned and they are freaking out, not knowing what to do. I know someone who got into a weaning nightmare with a shady breeder and it was a very, very heartbreaking situation.
I feel that this is something I have extensively been researching for a very long time and definitely feel ready to make the commitment. It hasn't been thought through lightly, as this bird could potentially outlive me. This will most likely be my last feathered kid.
I'll keep posting updates and keep everyone informed.
OH and I'm sure you all want to know...regardless of the sex, boy or girl, the bird's name will be Rudder...yes...as in an airplane rudder...
Tuesday, November 17, 2009
Lemon Cupcakes
These are courtesy of a Kraft magazine that usually comes free in the mail once in a while. They're absolutely delicious. And since they're just made with egg whites, they're more like sponge cake-cupcakes. And they're really easy.
Lemon Cupcakes
1 package white cake mix
1 package lemon flavor Jell-o pudding & pie mix
1 c. water
4 egg whites
2 T. oil
16 oz. confectioners' sugar
8 oz. cream cheese, softened
1/4 c. butter, softened
2 T. lemon juice
Preheat oven to 350. Beat cake mix, dry pudding mix, water, egg whites, and oil until moistened. Beat on medium speed until everything is nice and smooth. Spoon batter evenly into lined muffin tins.
Bake 21-24 minutes or until toothpick inserted in the center of the cupcakes comes out clean. Remove from pans and cool completely.
Beat confectioners' sugar, cream cheese, butter, and lemon juice on low speed until well combined and smooth. Frost cupcakes.
*NOTE: This recipe will give you a LOT more icing than you need. What I did was froze my leftover icing. So when I go to the grocery store the next week, I'll just buy a package of white cake mix, make some quicky-cupcakes, and use the remaining icing.
*NOTE #2: As I am writing this, I hear a little African Grey voice proudly proclaim "Come on out!" and she proudly leaps off her playstand into the floor. I run to get her back to her playstand and narrowly avoid a parrot poop on the floor! Only at Megs Food n Fids is it totally acceptable to discuss bird poop and food in the same post! Hehe enjoy your cupcakes!
Monday, November 16, 2009
Cheeko's New Cage
Well I ordered Cheeko a beautiful new big-boy cage and it's been sitting in the living room, it's in box, unopened for a week since I've been knocked out with swine flu. So yesterday my mom & dad put it together for him. I'm sure he appreciates all their hard work.

Rowan from BirdyBooty.com did an amazing job with this precious swing for Cheeko. The airplanes are just too Meghan right?


Come on in!

Uh oh! I think he's curious about these curtains...
FLU UPDATE: I'm doing a little better. Still exhausted. Good news is the fever has gone down. I've missed a week of work. I'm doing a little better each day. Today I felt well enough to go to the Starbucks drive-thru and get breakfast. But it wore me out. Ugh. But I've got a horrible case of laryngitis and sound like Minnie Mouse. I sure hope that goes away as soon as possible! It's embarrassing!
Saturday, November 14, 2009
It's Been Awhile

Yes, it looks like it's been about 2 months since I've updated. A LOT has happened. Started a great new job and have been really busy.
Right now I've been oh so blessed to get hit with H1N1. I've been MISERABLE since Tuesday. Woke up with a small tickle in my throat Monday and Tuesday it was a full blown flu. Each day is a LITTLE better than the last. I've almost completely lost my voice. I thought this H1N1 was supposed to be a mild flu? For me, it's been anything BUT mild. My asthma has been making this really hard to kick. I had a nice little visit to the ER Thursday night. If you go in there and mention SWINE FLU they immediately put a mask on you and usher you back to a room! That means NO WAITING and no long sits in the waiting room! HAHAHA.
Once I'm not a walking cloud of germs, I'll try to cook some more and update on the birds. Since H1N1 has jumped around to cats, I don't want to get near my pets. Don't know if dogs or birds can catch it, but I'm not taking a chance. Mom has been helping out a lot.
Thursday, September 17, 2009
Stuffed Peppers
Made these from peppers out of Mimi's garden!
Stuffed Peppers
4 Green Peppers
1 package of Lipton Fiesta Sides Spanish Rice
Cheese (if desired)
Slice tops off peppers. Discard seeds and veins so you essentially have a shell.
Prepare rice according to package directions.
Fill pepper shells with rice.
Bake at 400 for 20 minutes. During the last 5 minutes, sprinkle cheese on top if desired.
So easy my dad could do it without burning the house down!
Tuesday, September 15, 2009
Crunch Pumpkin Bars
This recipe came out of a cooking magazine I subscribe to. (Taste of Home Healthy Cooking) Enjoy!
Crunchy Pumpkin Bars
30 oz. pumpkin pie filling
12 oz. evaporated milk
3 eggs
1 box yellow cake mix
6 oz. chopped pecans
1 c. melted butter
Combine pumpkin pie filling, milk, and eggs. Pour into a greased 9 x 13 pan. Sprinkle with cake mix. Sprinkle with pecans. Pour melted butter over the top. Serve with cool whip.
Bake at 350 for 60-65 minutes.
Let set up and refrigerate. Yummy! It's like pumpkin pie, only better!
Saturday, September 12, 2009
Black Palm Cockatoo

Guess what I got to lay my eyes on last Friday? Yes, you guessed it! A real, live Black Palm 'Too! I feel like a kid on Christmas morning! I am so, so SO excited I got the opportunity.
I ran into Bird Fever up in Indy to get some loot for the fids. And I couldn't believe what I laid my eyes on.
They are incredibly beautiful in person! Pictures do not do justice. A member on BB described them as "prehistoric looking." That's the perfect description. That's why I love them! There's nothing like the beauty of a black palm 'too! And to see one up close in person is a really once-in-a-lifetime opportunity. These guys are VERY rare. And NO, I'm not adding one to the flock! They're about a $20,000 bird.

I guess I can just admire them from a distance! *sigh
Also, I was really impressed with that store. They have a great selection of toys and food at pretty reasonable prices. It's definitely not rip-off city.
They also have a lot of birds in the store! I also got the chance to see a Greater Vasa Parrot. Another rare one. Man, they're gorgeous too!

Monday, September 7, 2009
Sprouting!
Happy Labor Day!
I was always kind of intimidated by sprouting in the past. But a month ago, I decided I wanted to give it a try. I felt up to the challenge! And guess what...it's not a challenge at all! Now I haven't done sprouting with beans yet. They're a bit trickier. I might try legumes here soon and I'll do an entry on that. But this is easy and a great way for beginners to learn.
I ordered a sprouting mix from this website:
www.parrotsontheporch.com
I HIGHLY recommend this website. They have absolutely wonderful products. They have all kinds of great things, such as birdie bread and things to add into Birdie's diet. And they have great prices...you won't get ripped off!
I ordered the medium beaks sprouting mix since I'm sprouting for medium sized birds. They also have large and small if your fid is bigger or smaller. It's got lots of great things in it. This mix contains:
*Wheatberries
*Spelt
*Triticale
*Barley
*Brown Rice
*Kamut
*Fenugreek
*Millet
*Quinoa
*Pumpkin Seed
*Safflower Seed
*Hulled Sunflower Seed
Or you can go to the health food store and make your own mix. Whole Foods sells these ingredients and I know a lot of parronts who like shop there. However since I'm in Podunk, Indiana...we don't have Whole Foods. OK...I'm going to digress. We went into a Whole Foods in Plantation, FL while I was at Sheffield and holy mackrel! That place is too freaking cool.
OK...back to sprouting.
Supplies:
Alright, first of all you'll need a jar for your sprouts. I use a jelly or jam jar which you'd use in canning. It works perfect.
Now, you'll need a screen. I ordered this one off of the forementioned website. You can also find them at the craft store.


Now...let's sprout!
Step One: You'll need to soak your seeds overnight. Place them in the jar. Put the screen on, and put the lid on. Rinse several times until water runs clear. Fill the jar up and soak seeds overnight. Be sure to place your jar in an area that is cool and dry.

Good morning! Now what you have here is known as soaked seed. And you can rinse and drain this and feed this to Birdie. Soaked seed is very nutritious as well.
Step Two: If you're not going to do soaked seed, rinse and drain the sprouts. Rinse and rinse until the water runs clear. *TIP If you live in an area where mold is common or there's high humidity, I strongly recommend rinsing your sprouts with a touch of apple cider vinegar. Some people I know use grapefruit seed extract. I personally prefer apple cider vinegar. It's also a great thing to add into your bird's diet because it helps balance out the flora in their digestive system.
Repeat this rinsing process about 3 times a day. I do it when I eat breakfast, lunch, and dinner so I don't forget.
You should start to see sprouts appear within the first day and by the second or third day, they should be ready.
javascript:void(0)

Sprouts after 2 days
Keep in mind that when the tails on the sprouts reach more than 1/4 of an inch in length, that they will begin to taste bitter to Birdie. What I do is soak my mix on Friday night and rinse on Saturday, Sunday, and by Sunday evening, my sprouts are ready.
Store leftover sprouts in the refrigerator for up to one week.
What if my seeds don't sprout?
If they are not sprouting, toss them out! They are dead and shouldn't be fed to your bird. Your sprouts should have a nice, earthy smell to them. If you try to sprout dead seed it will just decompose and get nasty.
TIP #2: I wouldn't leave the screen on throughout the day, just when rinsing. Because the metal screen will rust where the lid comes into contact with it.
Have fun and hope your fid enjoys his/her sprouts as much as mine do!
Best Ever Pumpkin Bars
These are courtesy of the Pillsbury Dough Boy. I guarantee there's no better pumpkin bar recipe out there.

Best Ever Pumpkin Bars
4 eggs
2 c. granulated sugar
1 c. oil
15 oz can pumpkin*
2 c. all purpose flour
2 t. baking powder
1 t. baking soda
1/2 t. salt
2 t. ground cinnamon**
1/2 t. ground ginger**
1/4 t. ground cloves**
Frosting
8 oz cream cheese, softened
1/4 c. butter, softened
2-3 t. milk
1 t. vanilla
4 c. confectioners' sugar
1/2 c. chopped pecans
Preheat oven to 350. Spray 15 x 10 x 1 pan with cooking spray.
Beat eggs, granulated sugar, oil, and pumpkin until smooth. Stir in flour, baking powder, baking soda, salt, cinnamon, ginger, and cloves. Spread into pan.
Bake 25-30 minutes or until toothpick inserted into the center comes out clean and bars spring back when touched. Cool completely.
For frosting:
Beat cream cheese, butter, milk, and vanilla on low speed until smooth. Gradually beat in powdered sugar, about 1 c. at a time on low until frosting is smooth and spreadable. Spread frosting over bars. Sprinkle with pecans.
Store in the refrigerator.
*Be sure to get canned pumpkin and not pumpkin pie filling!
**You can substitute 2 1/2 t. of pumpkin pie spice in place of cinnamon, ginger, and cloves.
Sunday, September 6, 2009
Crescent Rolls (Pics included)
This is the same dough recipe from my Yeast Rolls post back in February.
I'm using the same dough, different roll.
Roll Dough
1 package active dry yeast*
1 1/4 c. warm water
1 c. scalded milk
1/4 c. sugar
1/4 c. shortening (Crisco butter flavor works great)
1 tsp. salt
3 1/2 c. sifted all-purpose flour
1 egg
Soften yeast in water. Combine milk, sugar, shortening,& salt. Let cool to room temperature. Add 1 1/2 c. of flour and beat well. Beat in yeast and egg. Gradually beat in remaining flour until a soft dough forms. *TIP #1: To keep dough from sticking to your hands when working with it, wet your hands down with water.
Put your dough in a greased bowl, also greasing the surface of the dough. Cover with a damp cloth and let rise for about 1 1/2 hours or until the dough is double in size.

Dough before

Dough after 1 1/2 hours.
*If you can't find yeast packets at the grocery store, you can just buy a jar of yeast. 2 1/4 t. of yeast = 1 packet. Be sure to refrigerate after opening.
OK. Turn dough out on to a lightly floured surface. And lightly means lightly! No one wants to eat yeast rolls that have a coating of flour on them. Ick.
I found it easier to split the dough into 2 sections. Roll into a 12 inch circle. Cut dough into 8-12 wedges. Brush with melted butter.

Starting with the big end, roll your triangle up. Place with the flap down on a lightly greased cookie sheet.


Set aside and let rise for 45-60 or until nice and big.
Preheat oven to 400. Bake 10 minutes or until lightly golden.

Makes 2 dozen rolls.
Saturday, September 5, 2009
Gizzy's Cold
Well, Gizzy hasn't been feeling to well lately. Monday she started wheezing. So I called the vet and we got her in ASAP.
She's got an upper respiratory infection. But it was caught early and didn't get into her air sacs, nor is she having a runny nose, which is a good sign. Had it got down in her air sacs, we would have been in big trouble. For the non-bird people reading my blog, when birds get sick, it's a lot more difficult for them to get over it than other pets. They do not do well with illness.
She got a shot of Convenia plus she's on Baytril for the next two weeks. Luckily, Dr. Hall was able to put the Baytril in a water solution that I can put in her water so that I don't have to fiddle with giving her meds orally. It causes a lot of stress + it's very tricky. I've never adminsitered meds orally to a parrot and now is not the time for me to learn!
She's so far doing pretty well. I've not heard much wheezing out of her the rest of the week. She's been sneezing here and there. I've been keeping her warm and covered up. Plus, she's eating really well and has a great appetite.
So where did she get this nasty cold? Hard to tell. I personally think she got sick from that nasty place I was at in Kentucky. The place was filthy when I moved in. I had sinus troubles during the time I was there, and I'm sure it wasn't good for Gizzy either. The stress of the move obviously wasn't helpful at all as well.
But now she's back home and settled in. She loves getting cuddled up in my big pink fuzzy bathrobe every morning. I have to let her out first thing so she can have her morning cuddles or she gets cranky.
I'll keep everyone posted on how she's doing.
Update + Peachy Shrimp (diabetic friendly too!)
Hi friends. I know it's been a month since my last update. The past month has been really really bad for me. Just a total zoo. BUT I'm back and I will TRY my hardest to get on here very frequently and update. I said that once before but I MEAN it this time! I've got plenty to blog about...lots of new recipes + bird things.
My mom made this shrimp tonight for dinner and it was DE-LICIOUS! And it's so easy my Dad could make it without burning the house down. And...it only takes like 6 minutes.
Peachy Shrimp
12-15 raw frozen shrimp, peeled, deveined, and no tails
1/4 c. olive oil
1/2 jar sugar-free peach preserves
1 t. Worschetshire sauce
1 T. soy sauce
4-5 dashes hot sauce
Thaw out shrimp according to package directions.
Heat olive oil over medium heat in a skillet. Add shrimp. Cook 3-4 minutes per side. You know when the shrimp is getting done when it starts getting pink in color.
Combine the ingredients for the glaze in a medium bowl. Blend well. Once shrimp is done, use a basting brush and brush the shrimp with the glaze.
Thursday, August 6, 2009
Hot Pasta
This is good as a side dish or even by itself for a quick lunch. And it'll clear your sinuses out in no time!
Hot Pasta
1 c. mini penne pasta
2 T. olive oil
Small teeny-weeny pinch each of:
Red pepper flakes
Garlic & Pepper Medley (or black peppercorns ground up)
Garlic Powder
Boil the pasta until tender. Drain. Stir in olive oil and spices.
It's really quick and easy!
Hot Pasta
1 c. mini penne pasta
2 T. olive oil
Small teeny-weeny pinch each of:
Red pepper flakes
Garlic & Pepper Medley (or black peppercorns ground up)
Garlic Powder
Boil the pasta until tender. Drain. Stir in olive oil and spices.
It's really quick and easy!
Tuesday, August 4, 2009
The Monkey House
Hi everyone! I hope you're enjoying your rainy thunderstormy Tuesday if you're reading from Indiana. I got drenched today going out to get some lunch. I'm taking a little break from packing to update and share something fun and off-topic from what I usually blog about.
I'm a sucker for old, historic homes. I've always said if I'm going to blow money and buy a really nice house, I want something older and historical. IMO, a lot of these new luxury houses you see popping up look EXACTLY a like. There's nothing unique about them! Watch HGTV...even the interiors in a lot of those places look a like! Why would you want to spend a million bucks on a house that looks like every other house in the neighborhood. What's fun about that?
This is one of two historic houses in Columbus (Indiana) that I'm just obsessed with. We actually used to live across the street from it. And supposedly these people used to have pet monkeys, so I always referred to this place as "The Monkey House." I still call it that.

The house was built in 1910. The exterior is made of limestone and apparently the walls are 16 inches thick. I just love how it looks from the outside. If you're interested in a good read and want to learn more about the history of the home, here's a blog link from the Columbus Historical Society about the place.
http://columbushomestour.blogspot.com/2008/09/1910-washington-street.html
When we went on the homes tour, I'll admit, it was VERY disappointing. You see this sprawling mansion on the outside and inside it needs A LOT of work. The carpet looks bad as does the wallpaper. And the kitchen looks like something from 1930. It was pretty bad. And he bathrooms definitely need updating! And aside from everything cosmetic, I'm sure there's a lot of other things that need work. It probably needs new wiring as well.
But as you can see in the pictures, the walnut woodwork is just gorgeous and I'm sure if you fixed it up, you'd have a gorgeous home with a neat history! But, my mom would have to disagree. She hates the Monkey House! Hehehe.


Sunday, August 2, 2009
Cheddar Bay Biscuits
OK...I know some of my readers on here are international so let me explain this.
Here in the States we have a seafood chain called Red Lobster and they serve these biscuits that are really good. They're called Cheddar Bay Biscuits.

I found this recipe online and switched a few things and cut it down to make 8 servings. Enjoy! It really does taste like the real deal thing!
Cheddar Bay Biscuits
1 3/4 c. Jiffy Baking Mix
1/4 c. + 1/8 c. cold milk
2 T. cold butter
1/8 t. garlic powder
1/2. cup grated cheddar cheese
To brush on top:
2 T. melted butter
2 t. dried chives
1/8 t. garlic powder
Preheat oven to 400.
Cut butter into baking mix with a fork until the mixture resembles coarse crumbs. Add cheddar, milk, and garlic powder. Mix until combined. But don't over mix it! (If you over mix it, the gluten in the dough will break down and you'll end up with tough biscuits!) Just mix it until everything is nicely moistened.
Drop by 1/4 cup-fulls onto a greased cookie sheet. Bake 15-17 minutes.
When biscuits have about 2 minutes left, brush with the melted butter mixture.

From Ryan
Hey everybody! Hope you all are having a great summer. One of my favorite things to do during the summer is grilling! In fact any season is good for grilling for me, but summer is the most enjoyable (rather than shivering in the snow while flipping burgers). (Ok...this is Meghan and I'm going to interject here and tell you that Ryan will for real actually stand outside and shiver and grill food.)
Anyway, here is a great summer evening dinner that I really enjoy. It is pretty easy to prepare but does require a little forethought. This meal was inspired by Chef Adam Perry Lange but I added and subtracted ingredients to make it a bit more practical. So without further adieu, here is my french inspired Steak and Midwestern BBQ side dishes.
For the Steak:
I chose an 8-10 ounce Sirloin for the actual meat. It was previously frozen and was allowed to thaw 24 hours in the refrigerator.
While the grill is warming up, season the steak with fresh ground pepper and sea salt. Just a few pinches on either side. Once you feel that there is enough seasoning, lightly coat the meat with canola or vegetable oil. Its important to rub the meat down with the oil after seasoning otherwise it wont lock in the flavor correctly. Also do not use olive oil for this portion, only use canola or vegetable oil, olive oil wont burn off properly and will kind of smolder on the meat. After this the meat is ready to cook.
Use non-stick cooking spray on the grill before applying your meat to grill. Once the meat is grilling try to avoid flipping the meat too much. It should only be flipped every few minutes. Depending on the grill try to cook around medium heat. Also every time you flip the meat, season the meat with more pinches of sea salt and ground pepper
While the meat is grilling, prepare the final seasoning for the steak. Use a cutting board and combine chopped Italian parsley, lemon zest, garlic salt, fresh ground pepper, and sea salt. Finish off the mixture with about 2 TBSP of extra virgin olive oil.
Once the meat is cooked to rare to medium (depending on preference) take the meat off the grill and place it on the cutting board with the seasoning mixture. Flip the meat around to make sure the meat is coated nicely with the seasoned mixture. Then place the meat on the grill for another minute or two a side to set the flavor in.* I did this process twice, then cooked it over the hottest place on the grill to caramalize the mixture. Just be careful not to burn the outside of the meat.*
Once the meat is cooked to the desired preference, it needs to cool for a few minutes then it is ready to serve.
For the Corn:
I chose bi-color corn on the cob. A few hours before cooking, soak the ear of corn in cold water. I usually let it soak until right before cooking. This will allow it to hold plenty of moisture when cooking.
Before cooking, remove most of the outer husk of the ear of corn, I usually leave 1-2 layers left. Then also peel back the husk and remove the silk. Once the ear is cleaned up with a little bit of husk left, either leave wet or apply some butter.
Now put the corn on the grill under low to medium heat. While it is grilling apply some “Mrs. Dash Original” seasoning to the corn within the husks to give it a “peppery” smoked taste.
Cook the ear of corn for about 15 minutes constantly turning the ear every 2 minutes or so to prevent it from getting to dry or burnt.
For the baked beans:
2 cans of Van Camps pork and beans
1/4 cup of brown sugar
1 tbsp of mustard
2 tbsp of ketchup
2 tbsp of hickory BBQ sauce
cooked pieces of bacon or bacon bits
Preheat the oven to 325F degrees
Place all of the ingredients in to larger Pyrex bowl and thoroughly mix together. Cover and place onto the middle rack and bake for 45 minutes.
Apply everything to plate and serve. As for a nice summer beverage to match for this meal, I would recommend an India Pale Ale (such as Red Hook's Long Hammer) or a Ryan's Limey Rum and Coke (as seen on this blog!).
Hope you enjoy this meal as much as I do!
-Ryan

Tuesday, July 7, 2009
How Many...?
This discussion was SOOO interesting on ThePerch and BirdBoard. How many birds would you have if you had every bird you wanted? You know what I'm talking about...we all have a little list in our mind of the species we just love. So what do YOU want? Here's my list!
Scarlet Macaw or B&G Macaw


Citron Crested Cockatoo

Blue Headed Pionus

And I know Ryan's list includes...
Green Cheek Conure

Painted Conure

Umbrella Cockatoo

Hahn's Macaw

OK...NO we are not going to end up with all these birds! My limit...5-6 parrots total. Some people know from an early age that they want a big family with a lot of kids. Not me, I knew that I wanted my own big flock of parrots. So I do plan on adding more to The Flock in the future. What we BOTH are dead-set on is a macaw. I've been in love with macaws since I was about 5. The Flock wouldn't be complete without one! So Mom & Dad...you're the ones to blame for the my macaw obsession! Remember when we went on vacation when I was like 5 or 6ish and some lady with a macaw and a cockatoo was letting people take souvenir pictures with her birds? I'm sure that picture is around here somewhere!!! I think I was wearing a navy blue and white polka dotted shirt in the picture. It was a Polaroid.
Saturday, June 27, 2009
What Michael Jackson Means to Me

So Michael Jackson is either one of those people you absolutely couldn't stand or your absolutely loved. Well...I LOVE Michael Jackson. IMO...Michael is one of the most talented people that has ever lived. I love every single Michael Jackson song...there is not one that I don't like. And you can't help but be amazed by all those crazy dance moves. He was really a musical genius. However, he did make some bad decisions. But here's my $0.02 on the whole child molestation thing:
Sure, there's evidence there that maybe he did some wrongdoing, but seriously...I think in this case these kids' parents should have thought things out a little more thoroughly. I wouldn't care if he's the King of Pop or the guy next door...why on Earth would you let your child spend the night at a man's house who thinks he's Peter Pan? Come on...these people were just out to make a fast buck and I think they took advantage of Michael.
But I digress. Michael will be greatly missed. It's hard to believe the King of Pop is gone. So what's my favorite Michael song? I like Billie Jean. I think my favorite album though would have to be Bad and my favorite video? I loved them ALL!
Cheeko LOVES to watch youtube videos hehe...so I put on some Michael for him to enjoy! He loved it. It was so funny because Gizzy got in on it too. During "Thriller" she started making her owl noise, "Hooo! Hoooo!" So funny!
Speaking of the birds and food...I really want to try and make some sticky wings here sometime. I'll post the recipe sometime this week.
Thanks for reading
Wednesday, June 17, 2009
Birdie Macaroni
I made this for Gizzy the other night! She loved it!
Birdie Macaroni
Cooked macaroni pasta, drained
Butternut squash baby food
2 T. frozen vegetables, cooked
1 baby carrot, chopped
Coat the macaroni pasta in a little bit of the butternut squash babyfood so it's like a sauce. Stir in the frozen veggies and carrot. Serve to Birdie!
NOTE: Be sure to buy babyfood that doesn't have added vitamins and minerals, especially iron since our fids are prone to iron storage disease.
Gizzy loved the peas in her frozen veggies...it's her favorite!
Thursday, June 11, 2009
The Kids
OK...I'm really going to TRY to quit neglecting this thing like I have been here lately!
Update on the kids:
Gizzy: She's been really good lately. She recently had her wings clipped. The neighbors are getting a new roof and the contractors outside banging around scared her, so she bolted downstairs in a panic. We don't need her getting hurt! I really hated to clip her but she doesn't need to be flying around like that! The vet says he can see MAJOR improvements from the day after I brought her in. He said she's really filling out nicely and her feathers are getting a really nice sheen to them. I'm very excited. She's also picking up a lot of new words and sounds. I think she's trying to sing the Menard's commercial on the radio. She's also dropped the S word on me as well. But that's what I get for trying to fiddle around with my printer in her presence when it wasn't cooperating! Oops.
Her favorite thing ever is oatmeal. She'll go nuts for it. I usually give her oatmeal a few times a week with baby food mixed in (only the baby food with the veggie/fruit puree and water! no added iron and such!). She LOVES the Chiquita Bananas and Squash. Yum yum. However, her squash gave her the runs tonight. Ick. We had 2 accidents outside of the cage.
Cheeko: Well, he's molting. His cage is full of orange feathers. There's enough there that it looks like an orange massacre lol. He's gained quite a bit of weight since I went to Sheffield. Ryan spoiled him a lot when I was gone. ;). I really need to get a gram scale so I can keep track of his weight. I'm trying to get him to exercise...he LOVES to run up and down the hall and climb his birdie ladder. So I do that with him daily.
He's also been super grumpy since he's molting. I was laying down with him yesterday (yea, all 3 of them are worse than dogs are with the bed...each thinks it's "their" place lol). So I was just lying down when all of a sudden an orange bundle of fluff decides to run up and grab me between the nose. My nose bled on and off again for a couple days. The scab is finally gone. Which is good. I know this is gross, but I'm a huge fan of those nasal irrigation things. Hadn't been able to use it since it's mainly just salt water and that'd burn like heck in my injured nose! Geesh. He's been really loony.
Maverick: Oh I finally get to see him tomorrow! I'm super excited! I can't wait! He's such a lover and such a sweetheart. Last time I was at Ryan's and I left to go back to Columbus, as I was pulling out of the driveway, Ryan called and told me as I was pulling out, Maverick looked up and said "Bye! Bye!" He's such a little Einstein. His hormones are getting a lot better than they were last time I visited. I'll be glad when "breeding season" is almost over! For the non-bird people reading, all parrots are extremely hormonal and moody in the springtime, as in the wild, that is their natural mating season. So one minute they're biting you or screaming at you, and the next their regurgitating their dinner on you...yes gross, but in the parrot world-regurgitating food is the way they say "I love you." Maverick's "Hello!" is also getting REALLY clear!
That's all for now! Ryan will be here this weekend and I'm sure we'll get pics of them all to upload.
Friday, May 29, 2009
Guilt-Free Layered Butterscotch Dessert
Feel fat after eating my brownies from the previous post? Try this next time around.
Guilt-Free Layered Butterscotch Dessert
2 c. sugar free pecan shortbread cookies
1/2 c. Splenda (divided)
6 T. butter, melted
16 oz. reduced fat cream cheese (softened)*
1/2 t. vanilla extract
3 c. + 1/4 c. cold milk
2 packages of sugar-free butterscotch flavor instant pudding & pie filling
8 oz. Cool Whip
Place the cookies in a plastic zip top freezer bag. Smash them until they resemble coarse crumbs. Combine, cookies, 1/4 c. of the Splenda, and melted butter until moistened. Press into a greased 9 X 13 baking dish. Set aside.
In a medium mixing bowl, add cream cheese, remaining Splenda, 1/4 c. of milk, and vanilla extract. Mix until smooth and well combined. Spread over pecan shortbread crust.
TIP: When spreading the cream cheese mixture over the crust, use a metal spatula that you'd use to ice a cake with and wet the back so that way it's a. easier to spread and b. when you wet it, the mixture won't stick to it and pull up the crust.
In a separate mixing bowl, add the 2 packets of pudding mix and about 2 3/4-3 c. of the cold milk. I started out with 2 3/4 c. and found I needed a little more, but you probably won't need over 3 or it's going to get runny. Mix on low speed for a few minutes. Set aside and let sit until it is soft-set. Then, spread the pudding mixture over the cheese mixture.
Spread cool whip on top of the pudding layer.
Refrigerate for several hours or overnight until firm.
*If you don't want to wait all day for your cream cheese to soften, just nuke it on high in the microwave for 30 sec. Oh..and remember reduced fat doesn't mean reduced calories! It's just a little easier on your arteries. ;)
Really Rich Triple Chocolate Espresso Hazelnut Brownies
These are great for chocolate lovers!! Like the name says...these are REALLY RICH. So I would only cut them up into 1 inch squares or so!
Really Rich Triple Chocolate Espresso Brownies
3 oz. bittersweet baking chocolate*
2 oz. semisweet baking chocolate
2 oz. unsweetened baking chocolate
3 T. unsweetened baking cocoa
1 1/2 T. instant coffee**
8 T. unsalted butter (cut up into about 6 pieces)
3 large eggs
2 t. vanilla
1 1/4 c. granulated sugar
2/3 c. oil
1/2 t. salt
1 c. all purpose flour
TOPPING
Nutella
Preheat oven to 350. Spray an 8 inch baking dish with cooking spray.
OK-this part may seem complicated but it's really not...just follow my directions so you won't make a mess or ruin your stuff.
If you don't have a double boiler (or you're like me and don't feel like messing with it and dragging it out...), use a medium glass mixing bowl. Bring some water to a boil in a medium-large saucepan, reduce heat, and let it simmer. Place the bowl on top of the saucepan so it rests in it. Add the semisweet chocolate, the bittersweet chocolate, the unsweetened chocolate, and the butter. Whisk and stir together until it is nicely melted and really smooth. Keep stirring.
Whisk in the cocoa and the instant coffee until nicely incorporated. Remove from the bowl from the saucepan and sit aside to cool. NOTE: You MUST let that chocolate mixture cool quite a bit before adding it into the egg mixture or else you'll cook your eggs. GROSS! You don't want scrambled egg brownies. You'll know it's cool enough when you stick your finger in the mixture and it's lukewarm. (Clean fingers of course)
In a separate mixing bowl, add eggs, sugar, vanilla, oil, & salt until well combined. SLOWLY whisk in the chocolate mixture until well incorporated. Once that's done, slowly add in the flour, whisking after each addition until thoroughly blended. Once that's done, pour the batter into the 8 inch baking pan.
Bake for 25-30 minutes or until a toothpick inserted in the center comes out clean, with only a few moist crumbs clinging to it. Cool to room temperature and frost with Nutella and refrigerate for up to 5 days. If you want to freeze these, don't cut them up, but just wrap them in foil and when you're ready to serve, defrost in the counter, top with the Nutella, and enjoy.
*My recipe called for 5 oz of semisweet chocolate. However, I had some leftover bittersweet chocolate in my freezer that needed to be used up. So that's why I used 3 oz. of the bittersweet and 2 oz. of the semisweet.
**I used decaf instant coffee for this. I drink a lot of Diet Coke so I don't need any more caffeine. Also, you can buy the instant coffee (Nescafe brand) in a box iof 6 individual single serve packets for about $1.00. That's cheaper and less wasteful than buying a jar of it especially if you don't drink it (i.e. my mother).
Tuesday, May 26, 2009
Food for Thought

Ryan and I had a discussion tonight about bird people vs. non-bird people. I am addicted to birdboard. Another member (a man) posted that he was at a party over the holiday weekend and he was talking to a lady who seemed interested in him. However, once he showed her a pic of his lovebird, Kiwi on his cell phone, he was immediately rejected...the girl said he was "sad" and basically a loser since he thinks so highly of his lovebird. However, I'm sure if that was a pic of his puppy...he wouldn't have been called sad or a loser...he probably would have gotten her phone number. Also, I read a discussion about what do you tell non-bird people who just don't get it? So many people had different responses...found it a very interesting read. Makes me think...what DO you tell a non-bird person? Usually what I've found it's really more of whether the person is an animal lover or not...the animal lovers may prefer another type of companion animal...but they understand WHY we love our parrots so much.

So why do we love parrots so much? They're intelligence. It's really unlike ANY other creature on this Earth...no cat or dog has the intelligence that a parrot has. It's really alien...sometimes it's just eerie that an animal can identify objects, solve puzzles, dance to a beat, and use tools.
The three of them never cease to amaze me. Gizzy has figured out how to WEAVE fabric through the bars of her cage. She however isn't too much of a talker, but if you're up to something and she can't see you...she always says "What are you doing?" And that is the ONLY time she will use that phrase...she rarely uses it, unless she wants to know what's going on. That's exactly why Ryan and I love parrots so much...an animal has the ability to communicate just like us...and not mimic it. It's very amazing that an animal is inquisitive.
Any bird person will tell you the same...We do not have parrots...but little toddlers covered in feathers.

Tuesday, May 19, 2009
Banana Bread
Add 3/4 c. of chopped nuts if you wish. I omitted them.
Banana Bread
1 3/4 c. all purpose flour
2 t. baking powder
1/2 t. baking soda
1/2 t. salt
1/2 t. ginger
1/4 t. allspice
1/4 t. nutmeg
1/2 c. butter, softened
3/4 c. sugar
2 eggs
4 medium bananas, mashed
Sift the dry ingredients together in a medium size bowl. Set aside.
Beat butter until creamy. Add in sugar until nice and smooth. Beat in eggs until well combined.
Mash the 4 bananas. I personally like to use an emulsion blender on them when they're done mashed...that way they're REALLY smooth. If you don't get those bananas really smooth, you'll end up with big slimey pieces of banana that sink to the bottom of the bread and it's not pretty.
Alternately beat in the flour mixture and the bananas into the butter mixture. Beat until well combined and smooth. Pour into a greased 9 x 5 loaf pan. Bake at 350 for an hour or until a knife inserted in the center comes out clean. ENJOY!!
Monday, May 18, 2009
I'm BACK!
Hi everyone! I'm back!! I am all done with school! I took my oral and practical exam on Friday and did great! I'm happy to be back.
At the suite we stayed at, we didn't have an oven!! Only a cooktop and a microwave! AHHHHH! Needless to say, I'm VERY happy to have an oven and be back in the kitchen.
I didn't have any key lime pie in Florida even tho that's the state pie! Ryan had asked me about a cheesecake, so I decided to combine the two.
Key Lime Cheesecake
1 3/4 c. graham cracker crumbs (I used Honey Maid)
5 t. melted butter
1 c. + 1 T. granulated sugar
24 oz. softened cream cheese*
1 t. vanilla
1/2 c. lime juice**
1 t. vanilla extract
3 eggs
5 drops green food coloring
1 T. all purpose flour
Preheat oven to 350.
Place the graham crackers in a large ziptop bag. Crush with a rolling pin until they resemble coarse crumbs.
Mix the graham crackers, 1 T. of sugar, and melted butter until moistened and well combined. Press into the bottom of an 8 in. springform pan. (I sprayed the pan with a little cooking spray first).
Bake at 350 for 5-7 minutes. Remove and set aside.
In a large bowl, combine cheese, sugar, and vanilla. Beat until smooth. Add lime juice and eggs. Continue beating until nice and creamy. Add in the food coloring.
Pour filling in the pan on top of the graham cracker crust. Place in a hot water bath. (Fill up a large pan with HOT water until it comes halfway up the side of the springform pan. Be sure to add some tin foil around the outside of that springform pan so no water leaks in).
Bake at 350 for 65-70 minutes, or until the center springs back when touched. Or until you notice the top of the cake starting to get very light brown.
Remove from the oven and cool to room temperature. Refrigerate overnight. Serve with cool whip. Enjoy!
*Reduced fat cream cheese works just fine.
**I used the lime juice from those little bottles that look like limes you can find for $.78 at Wal-Mart...I was NOT in the mood to juice a bunch of little limes).
Did you know? REAL key lime pie actually isn't green? It's more of a yellow-ish color (eggs). So that pretty green is food coloring. I like mine the fake green way...so I added some food coloring to this. ;) And doesn't it taste more limey if it's green anyway? Hehe.
Tuesday, April 21, 2009
I'll Be Back!!
Sorry I haven't updated!! I've really been bad about neglecting my blog lately. I have a week and a half till my residency class. I leave on May 2nd and will be gone until the 17th. Don't worry! I promise I won't disappear!
I have to find a good Manhattan clam chowder recipe. My mom's been after me about it for some time! Sculley's in Madiera Beach, FL has this little hut place that's kind of like an outdoor eatery/bar and they serve this amazing Manhattan clam chowder. Best ever!
Birds are all well. Gizzy's doing GREAT. She's got a new thing now...oatmeal! She loves her oatmeal. She just begs for it! And she's also figured out how to sneak stuff out of the toy & treat basket, so that's now hidden from her.
And Ryan, I hope you get well soon! He's got a terrible cold/flu thing going on.
xoxo
Monday, April 13, 2009
Chocolate Chip Cheesecake
Chocolate Chip Cheesecake
CRUST
2 c. crushed Oreos
2 T. melted butter
FILLING
3 eggs
16 oz. cream cheese, softened
3/4 c. granulated sugar
1 t. vanilla
1/2 c. heavy whipping cream
1 c. mini semisweet chocolate chips.
1 T. flour
Combine crust ingredients. Press into the bottom of a 9 inch springform pan with clean fingers.
Beat eggs. Add cream cheese, sugar, & vanilla. Beat until smooth. Add whipping cream and blend well.
Mix the 1 T. of flour and chocolate chips until they chocolate chips are nicely coated. The flour keeps them from sinking to the bottom of the cheesecake.
Pour 1/2 c. of the chocolate chips in the cheesecake batter. Pour into prepared crust. Sprinkle in the remaining 1/2 c. of chocolate chips.
Bake at 325 for 65-70 minutes OR until the center is set.
To minimize cracking, place in a shallow pan with HOT water that comes halfway up the side of the springform pan. Wrap your springform pan in aluminum foil just so no water leaks into the pan.
To keep the cheesecake from sinking in the center, don't let kids and dogs horseplay in the house and jar the floor.
Once cheesecake is finished baking, remove from oven and cool COMPLETELY. Remove from sides of pan carefully. I'd use a butter knife to loosen any edges up. Refrigerate overnight OR wrap in plastic wrap and foil and freeze for up to one month.
PS-This cheesecake recipe will look prettier than the picture. I did this cheesecake before I figured out to add flour to keep chips from sinking. So I added some to the top for decoration. If you follow this recipe, it will look better.

Sunday, April 12, 2009
Happy Easter!
Hi friends! I hope you all had a great Easter! We sure did. We didn't really do much. But that's what a holiday is for, right?
We enjoyed a nice turkey for Easter! I was so excited. I'm a dark meat junkie!!
GIZZY UPDATE
Gizzy is adjusting wonderfully to her new home. She's such a great little girl and she's so intelligent, it's unbelievable. She's getting more and more vocal. She's surprising me with all her cute sounds. She mimics a smoke detector to a T, she has a dozen different whistles, she says "COME ON!", and I don't like this, but obviously since the previous owner was a smoker, she mimics the sound of someone puffing on a cigarette. I'm saying it's her sigh, or someone blowing out a candle. I've tried to ignore it, like you would if they say a potty word, but she does it 24/7.
She's also loving her newspaper bouquets and shredder toys. She has not chewed her feathers at all since she's been home! Lets keep it that way. She's also a huge cuddler. She loves to snuggle up to you and give kisses.
Like I said, she's unbelievably smart. I was relaxing and watching Dirty Dancing this afternoon, so I turned her radio off. I have it down by her cage. She crawled down to the floor, stared at the radio, looked at me, stared at the radio, etc. So she's figured out that's where the music comes from! Once I got up to turn it on, she was content and went back to the top of her cage.
She LOVES to just sit and watch you and see what you're doing. Her favorite fruit is grapes. She goes nuts for grapes.
Last night was a little difficult. She had a couple nightmares, so I didn't sleep too well. She woke me up around 6 am. She was freaking out...growling, etc. So I woke her up, gave her a little head scratch and we were able to go back to bed. I hope tonight goes better.
As far as her age, she is NOT 11. I contacted a lady on birdboard who's got her own flock of greys, including rescues, and we did some research on her band number. She is at least 18. But that's very young for a bird that can live upwards of 70 years.
I'm sorry I haven't posted any recipes lately. I've been so busy. But I might post my chocolate chip cheesecake recipe sometime this coming week. We had it at thanksgiving, and since we had turkey today, it reminded me of it. Plus, I'm in the mood for some pancakes. I'm working on a recipe that's for BOTH people and parrots! Vicky on facebook had said she was making a pancake breakfast for her flock on Easter so I'm going to steal her idea!!
Here's some pictures of Gizzy. Pictures just don't do justice. She's even more adorable in person.

Playing with a newspaper bouquet.

Having a cuddle with Mommy.

Scratching her head with her shredder

Chowing down on a grape.
Subscribe to:
Posts (Atom)


